Step 1: Downloading CodeIgniter
Nice, CodeIgniter is small and lightweight framework. The
zipped download for version 1.5 is only 737 KB. You don't need long time to
download it. You can get it from http://www.codeigniter.com. CI was written by
Rick Ellis, rock musician turned programmer.
Step 2: Installing and Exploring CodeIgniter
Once you have downloaded CodeIgniter, all you need to do is unzip it, and rename the “CodeIgniter_1.7.0″ folder toeither the application name or, in this case, “ci” and upload it to your PHP and MySQL enabled server.
Now that its on your server, I’ll explain what all the folders and files are for:

- The system folder stores all the files which make CI work.
- The application
folder is almost identical to the contents of the system
folder
this is so the user can have files that are particular to that application, for example if a
user only wanted to load a helper in one application he would place it in the system/application/helpers folder
instead of the system/helpers folder. - The config folder
stores all the config files relevant to the application. Which
includes information on what libaries the application should auto load and database details. - The controllers folder stores all the controllers for the application.
- The errors folder
stores all the template error pages for the application. When
an error occurs the error page is generated from one of these templates. - The helpers folder stores all the helpers which are specific to your application.
- The hooks folder
is for hooks which modify the functioning of CI’s core files,
hooks should only be used by advanced users of CI - The language folder
stores lines of text which can be loaded through the language
library to create multilingual sites. - The libraries folder stores all the libraries which are specific to your application.
- The models folder stores all the models for the application.
- The views folder stores all the views for the application.
- The cache folder stores all the caches generated by the caching library.
- The codeigniter folder stores all the internals which make CI work.
- The database folder
stores all the database drivers and class which enable you to
connect to database. - The fonts folder stores all the fonts which can be used by the image manipulation library.
- The helpers
folder stores all of CI’s core helpers but you can place your own helpers
in here which can be accessed by all of your applications. - The language folder
stores all of CI’s core language files which its libaries and helpers
use. You can also put your own language folders which can accessed by all of your applications. - The libaries folder
stores all of CI’s core libaries but you can place your own libraries
in here which can be accessed by all of your applications - The logs folder stores all of the logs generated by CI.
- The plugin folder
stores all of the plugins which you can use. Plugins are almost identical
to helpers, plugins are functions intended to be shared by the community. - The scaffolding
folder stores all the files which make the scaffolding class
work.
Scaffolding provides a convenient CRUD like interface to access information in your database
during development. - The user_guide houses the user guide to CI.
- The index.php
file is the bit that does all the CI magic it also lets the you change the
name of the system and application folders.
Step 3: Configuring CodeIgniter
Getting CI up and running is rather simple. Most of it requires you to edit a few configurationfiles.
You need to setup CI to point to the right base URL of the app. To do this, open up system/application/config/config.php and
edit the base_url array item to point to your server and CI folder.
- $config['base_url'] = "http://localhost/ci/";
Step 4: Testing CodeIgniter
We’ll do a quick test to see if CI is up and running properly. Go to http://localhost/ci/ and youshould see the following.

Step 5: Configuring CodeIgniter Cont.
If you’re up and running, we should finish the configuration. We are starting to configure it specifically for our new helloworld app. If you want to use a database with your application, (which in this tutorial we do.) open up system/application/config/database.php and set the following array items to there corresponding values. This code connects to a MySQLdatabase called “helloworld” on a localhost with the username “root”, and the password, “root”.
- $db['default']['hostname'] = "localhost";
- $db['default']['username'] = "root";
- $db['default']['password'] = "root";
- $db['default']['database'] = "helloworld";
- $db['default']['dbdriver'] = "mysql";
have to specifically load it each time we connect. Open the system/application/config/autoload.php file
and add ‘database’ to the autoload libaries array.
- $autoload['libraries'] = array('database');
- $route['default_controller'] = "Helloworld"
and delete the welcome_message.php file.
Step 6: Create the Helloworld Database
As this isn’t really a tutorial on MySQL, I’ll keep this section as short as possible. Create a database called “helloworld” andrun the following SQL through phpMyAdmin (or similar MySQL client).
CREATE TABLE `data` (
`id` int(11) NOT
NULL auto_increment,
`title` varchar(255)
NOT NULL,
`text` text NOT
NULL,
PRIMARY KEY (`id`)
) ENGINE=InnoDB
DEFAULT CHARSET=latin1 AUTO_INCREMENT=2 ;
INSERT INTO `data` (`id`, `title`, `text`) VALUES(1, 'Hello
World!', Test Hello World!');
Step 7: Create the Helloworld Model
Models are optional in CI, but it’s considered best practice to use them. They are just PHP classes that containfunctions which work with information from the database. Go
ahead and make a helloworld_model.php file
in the system/application/models folder.
In this file, create a Helloworld_model class, Helloworld_model construct and a function called getData.
In the getData function we are
going to use Active Record database functions which speed up database development times when working
with CI and databases. Essentially, they are simplified functions to create queries.
<?php
class Helloworld_model extends Model {
function Helloworld_model()
{
// Call the Model constructor
parent::Model();
}
function getData()
{
//Query the data table for every record and row
$query = $this->db->get('data');
if ($query->num_rows() > 0)
{
//show_error('Database is empty!');
}else{
return $query->result();
}
}
}
?>
Step 8: Create the Helloworld Controller
Let’s create a controller that will display the view, and load the model. That way, whenyou go to the address http://localhost/ci/index.php/helloworld/, you will see the data from the database.
In the folder system/application/controllers, create a file called helloworld.php.
In this new file, we’ll create a class which has the same name as the file.
Within this class, you need to create a function called “index”. This is the function that will be
displayed when no other is provided – e.g. when http://localhost/ci/index.php/helloworld/ is
visited. If, for example, we created a function called foo, we could find this as http://localhost/ci/index.php/helloworld/foo/.
The key thing to remember is how CI structures its URLs; e.g http://host/codeignitordirectory/index.php/class/function.
In the controller index function, we need to load the model, query the database, and pass this queried
data to the view. To load any resources into CI e.g. libraries,
helpers, views, or, models, we use the load class. After we have loaded the model, we can access it through
its model name and the particular function. To pass data to a view we need to assign it to an array
item and pass the array – which recreates the array items as a variable in the view file.
<?php
class Helloworld
extends Controller{
function
index()
{
$this->load->model('helloworld_model');
$data['result']
= $this->helloworld_model-><span
class="sql">getData</span>();
$data['page_title']
= "CI Hello World App!";
$this->load->view('helloworld_view',$data);
}
}
?>
If we visited http://localhost/ci/index.php/helloworld/ now,
it wouldn’t work; this is because the view file does not exist.

Step 9: Create the Helloworld View
The view file is what the user sees and interacts with, it could be a segment of a page, or the whole page. You can pass an array of variables to the view through the second argumentof the load model function. To make the view for our tutorial, create a new file called helloworld_view.php in the system/application/view folder. Next, we just need to create our normal html, head
and body elements, and then a header and paragraph for the information from the database. To display all
the records received from the database, we put it in a “foreach” loop
which loops through all the elements.
<html>
<head>
<title><?=$page_title?></title>
</head>
<body>
<?php foreach($result as $row):?>
<h3><?=$row->title?></h3>
<p><?=$row->text?></p>
<br />
<?php endforeach;?>
</body>
</html>
You may have noticed that we are using php alternative syntax, this provides
an convenient and timesaving way to write echo statements.
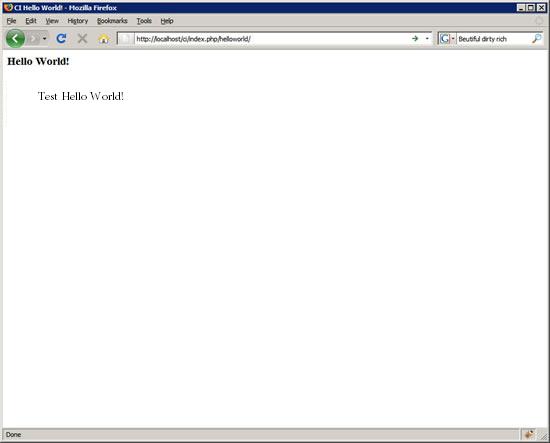
Step 10: Ta-da and Some Extras
When you visit “http://localhost/ci/index.php/helloworld/”, youshould see something similar to this.
like removing that annoying index.php bit out of the URL. You can accomplish this task by creating a .htaccess file in the root folder, and adding the following code.
RewriteEngine on
RewriteCond $1 !^(index\.php|images|robots\.txt)
RewriteRule ^(.*)$ ci/index.php/$1 [L]
You’ll also need to open up the config.php file in system/application/config/
and edit the index_page array item to a blank string.- $config['index_page'] = "";
not enabled by the server. To do this, open up the same file as before, system/application/config/config.php, and set the rewrite_short_tags array item to TRUE.
- $config['rewrite_short_tags'] = TRUE;


No comments:
Post a Comment